Here goes my attempt at a contouring tutorial!This is just my way, I'm not an expert myself. I can however spot a bad contour, some people look like they've been abroad and sunbathed with their glasses on for too long.
--------------------------------------
What is contour?
so contour literally means to 'outline' a shape or a figure. In cosmetic terms it means to create shadows, so your shadowing your face. Shadows help to define certain areas, so any area you want to push back from your eye you need to contour.
What do you use? 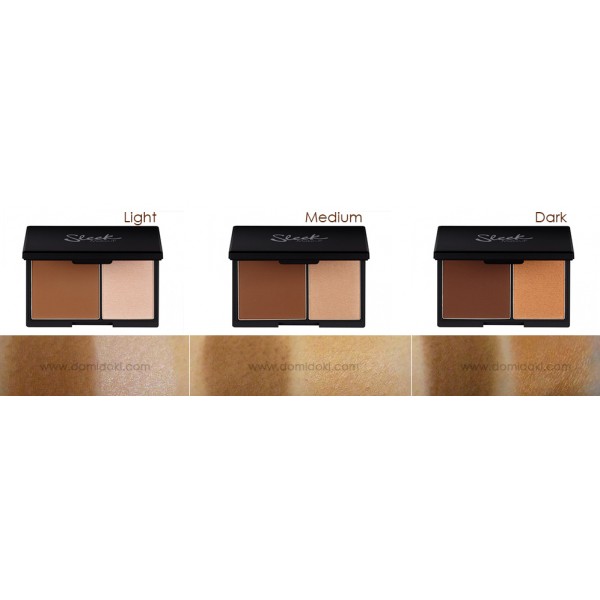 I use sleek's contour kit which retails at £6.49 grab yours here
You also need a couple of brushes to apply the dark colour correctly.
What is highlight?
highlighting is the opposite of shadowing, it means adding light to your face. Opposite again to contouring your pulling things towards your eye.Making it appear brighter.
What do you use?
 MAC's highlighter in light boost grab yours here. This is abit pricey at £18.50 but there are cheaper ones, for example in the Sleek contour kit there is two colours and the lighter colour from that would do perfectly fine it's just personal preference. Sleek also do a highlighter just like this for more than half the price i have linked it here. This product comes in 3 different shades, Bright Forecast, Radiant rose and Light boost.
So i start by applying the darker colour, i pout to create the natural cheek bone lines and apply with a slanted brush. http://www.boots.com/en/Real-Techniques-Limited-Edition-Duo-Fibre-Set_1333699/. I also put it along my forehead, down the sides of nose and along the jaw line.

next is the white (pale colour) I apply this to the middle of my nose, below the dark line on my cheek bone, in triangular sections from the eye down onto my cheeks, a small amount on my cupids bow and a splash on my chin.That was a long sentence! The MAC highlighter is like a pen so application is super easy. If your using a white powder or similar product to do this step then a blusher brush is fine to use or a fine fiber brush ( even an eyeshadow brush will do the trick)heres a cheap one.
Below are some photos of where you should be so far.


So by now your looking kinda creepy, its not the best look, You would 'nt want your crush to come to the door whilst you were contouring put it that way! My cousin will kill me when she sees this photo, but at least you have an idea what i mean.( love you Harriet!) :')

next step is to blend all this in and then apply your foundation. The other day i picked up some makeup sponges from the hairdressing warehouse so i have been using them to blend in. Any makeup sponges will do, lots of people like the beauty blenders, but I can't bring myself to spend £15 on a sponge.. heres one for you to see Im sure it's great but i just cant. You can buy them on E bay and they are just as good, there is a link here to one for £2.29! HERE. Take your sponge and wet it under the tap, it should double in size, squeeze out the excess water. Next, apply some foundation to the back of your hand and dab your blender into the foundation, I'm using my normal MAC foundation. You don't want too much as you just want to blend in the colours and you already have a lot of makeup on your face.
It's very important to set your face at this point,with powder. Use a powder brush I like Real Techniques powder brush. Any will do, this step is very important as you don't want the colours to run into each other.

It should all be coming together now and your face should be looking radiant and slim!
I'd love to know how you lot all contour, as I said before this is just one way I'm not saying It's the right way It's just the way i like to do It. Thanks for reading, let me know how you get on!
Happy Contouring!