Showing posts with label eyebrows. Show all posts

Sunday, 7 February 2016

Last nights makeup


Hi all hope you've had a lovely weekend, they go so fast!😩 especially if you work Saturdays like me, anyway, I can't moan. 

Last night I went out with the girls to Penny Blacks In The Mailbox In Birmingham for my best friends birthday and today I've been at my dads in Cheltenham. What have you been up to?

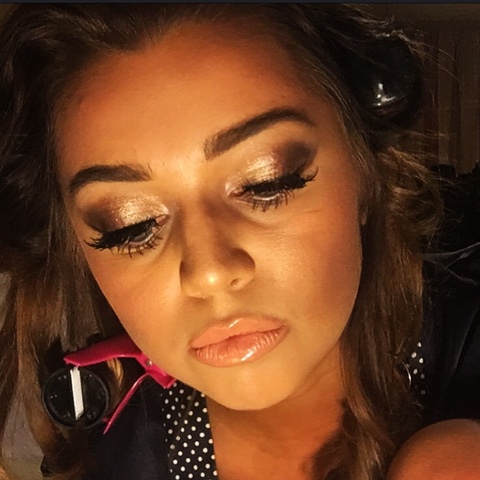
I thought I would share with you some of the main products I used for my makeup last night. 

Lashes- Eylure volume 107 (My fave!)
Eyes- revolution FLAWLESS eyeshadow palette, Charlotte Tilbury Cameleon eyeshadow stick. 
 Double wear foundation in shade SHELL BEIGE. 
Powder- Maybelline super stay 24 hours.
Contour- CT Contour kit, also revolution sculpt and contour kit in shade CO4.
Blush- NARS in shade Orgasm. 
Lips-Kiko lip liner in pearly pink. 
Charlotte Tilbury- Hepburn honey.
Charlotte Tilbury- seduction lipgloss.

And of course to finish....Urban decay setting spray. 


Have you used any thing recently that you've loved? Fran xx

Monday, 30 March 2015

MASTER YOUR CONTOURING


Here goes my attempt at a contouring tutorial!This is just my way, I'm not an expert myself. I can however spot a bad contour, some people look like they've been abroad and sunbathed with their glasses on for too long.
--------------------------------------
What is contour?
so contour literally means to 'outline' a shape or a figure. In cosmetic terms it means to create shadows, so your shadowing your face. Shadows help to define certain areas, so any area you want to push back from your eye you need to contour.
What do you use? 
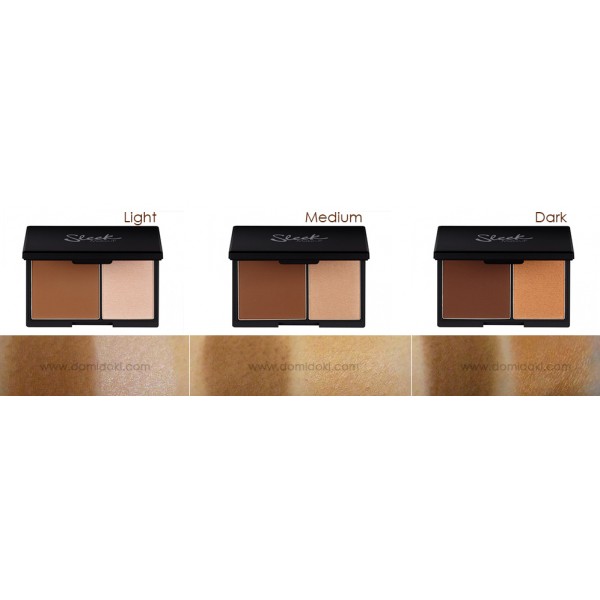
I use sleek's contour kit which retails at £6.49  grab yours here
You also need a couple of brushes to apply the dark colour correctly.


What is highlight?

highlighting is the opposite of shadowing, it means adding light to your face. Opposite again to contouring your pulling things towards your eye.Making it appear brighter.

What do you use?

MAC's highlighter in light boost grab yours here. This is abit pricey at £18.50 but there are cheaper ones, for example in the Sleek contour kit there is two colours and the lighter colour from that would do perfectly fine it's just personal preference. Sleek also do a highlighter just like this for more than half the price i have linked it here. This product comes in 3 different shades, Bright Forecast, Radiant rose and Light boost.


So i start by applying the darker colour, i pout to create the natural cheek bone lines and apply with a slanted brush. http://www.boots.com/en/Real-Techniques-Limited-Edition-Duo-Fibre-Set_1333699/. I also put it along my forehead, down the sides of  nose and along the jaw line.


next is the white (pale colour) I apply this to the middle of my nose, below the dark line on my cheek bone, in triangular sections from the eye down onto my cheeks, a small amount on my cupids bow and a splash on my chin.That was a long sentence! The MAC highlighter is like a pen so application is super easy. If your using a white powder or similar product to do this step then  a blusher brush is fine to use or a fine fiber brush ( even an eyeshadow brush will do the trick)heres a cheap one.
Below are some photos of where you should be so far.


So by now your looking kinda creepy, its not the best look, You would 'nt want your crush to come to the door whilst you were contouring put it that way! My cousin will kill me when she sees this photo, but at least you have an idea what i mean.( love you Harriet!) :')

next step is to blend all this in and then apply your foundation. The other day i picked up some makeup sponges from the hairdressing warehouse so i have been using them to blend in. Any makeup sponges will do,  lots of people like the beauty blenders, but I can't bring myself to spend  £15 on a sponge.. heres one for you to see Im sure it's great but i just cant. You can buy them on E bay and they are just as good, there is a link here to one for £2.29! HERE. Take your sponge and wet it under the tap, it should double in size, squeeze out the excess water.  Next, apply some foundation to the back of your hand and dab your blender into the foundation, I'm using my normal MAC foundation. You don't want too much as you just want to blend in the colours and you already have a lot of makeup on your face. 


It's very important to set your face at this point,with powder. Use a powder brush I like Real Techniques powder brush. Any will do, this step is very important as you don't want the colours to run into each other.


It should all be coming together now and your face should be looking radiant and slim! 

I'd love to know how you lot all contour, as I said before this is just one way I'm not saying It's the right way It's just the way i like to do It. Thanks for reading, let me know how you get on! 


Happy Contouring!


Thursday, 26 March 2015

Those all important EYEBROWS!


     That 'Perfect Brow' Shape.


My next post is about... yep you guessed it, eyebrows. My obsession. The one thing I won't leave the house without (You know what I mean anyway!). Keep reading to find out how I 'tame my bushes' hahaaa!

So the most important thing about eyebrows is a good basic shape. Endless amounts of makeup can't help badly shaped brows, if you're a 'sucker for a plucker' then leave them to grow for a few weeks (2 to 4 depending on how thin they are), over plucked brows are not attractive.Your arch should be starting just outside your pupil. Also, thicker brows generally tend to portray youth. So put the tweezers down... yes, you... step away!! For me I like to have them threaded, It's quick, bare-able on the pain scale and the effects are well worth it.  I get mine done every month at my local newsagents, sounds horrendous really but there is a lady in a back room who does them for £3! £3 girls!! I do feel dodgy when I walk in and ask the cashier 'if she's upstairs' like it's some kind of drug deal!! haha. I heard of her through some friends whose eyebrows I admired and asked where they had their's done. She's a lovely lady, I always tip her a pound or two as i feel bad for her doing them so well for such little money! underselling herself If you ask me. I'd gladly pay £5. So yeah! If you live in Sutton Coldfield or Birmingham, try her out! She's in the newsagent's opposite Aldi.

I know a lot of people use eyebrow pencil to fill their brows but I just can't get the hang of it and end up looking like i have drawn lines on my face as if crossing off a word in a word-search! Which as you can imagine... is not a good look. If you can use an eyebrow pencil successfully, I take my hat off to you. I stick to my
brown eyeshadow and a small angled brush to create this look. I use the MAC eyeshadow in shade 'expresso' & eco tools angled eyeliner brush.

My top brow DO's & DON'T'S:

  1. never use black- please please do not fill your brows with black, unless you want sharpie brows. Even if your hair is very dark naturally, go for a dark brown, it's too harsh otherwise.
  2. Matte finish eyeshadows are best -you don't want to look sweaty.
  3. Go for a Khaki Colour- Because hair naturally has a khaki undertone to it, using a brow pencil that has a touch of khaki colour will look more natural.  For whatever reason, most companies have reddish tinted brow products. This colour just screams “Fake!” So say no to the red tones.
  4. Use a concealer - underneath your brows to give that 'finished' look.
  5. Trim your brows -  another way to get that square look at the start of your brows is to trim your hairs with nail scissors, all to the same legnth. This will make them appear thicker and make an easier canvas for you to work with.
  6. Eyebrow gel- If your brows are thick and curly, use a brow gel like this one to keep them in place all day.  GOSH BROW GEL

Application: 
Starting with my natural brow, I use a lash & brow comb to smooth out my hairs, I sometimes wake up with them in all different directions, quite funny, Jacob laughs at me. So now they're all standing to attention, I take my angled brush and apply eyeshadow to the bottom line, so all along the bottom of my natural brow shape. Then, along the top. So now you have your two lines to follow when you are filling in. Next, fill in the mid and ends of your brow with your brush with smooth strokes to spread the product evenly. Remember less is more so when you think you've put enough on, take a mirror into natural light and look at yourself at arms length, like someone else would. Finally, the 'front' if you like. So I HATE it when girls eyebrows look like tadpoles with a huge head and small tail. So for me I just simply follow the natural hairs making it slightly squarer as I get to the very top. Not too round, not too square.

if you look closely at the bottom photo, no ones two brows are the same, my left brow is a lot thicker at the start that the right, so do your best to match them up by adding bits into the  g / a  / p / s .